Distribution
Last updated
Was this helpful?
Last updated
Was this helpful?
Skatter offers several distribution types, each useful in different situations.
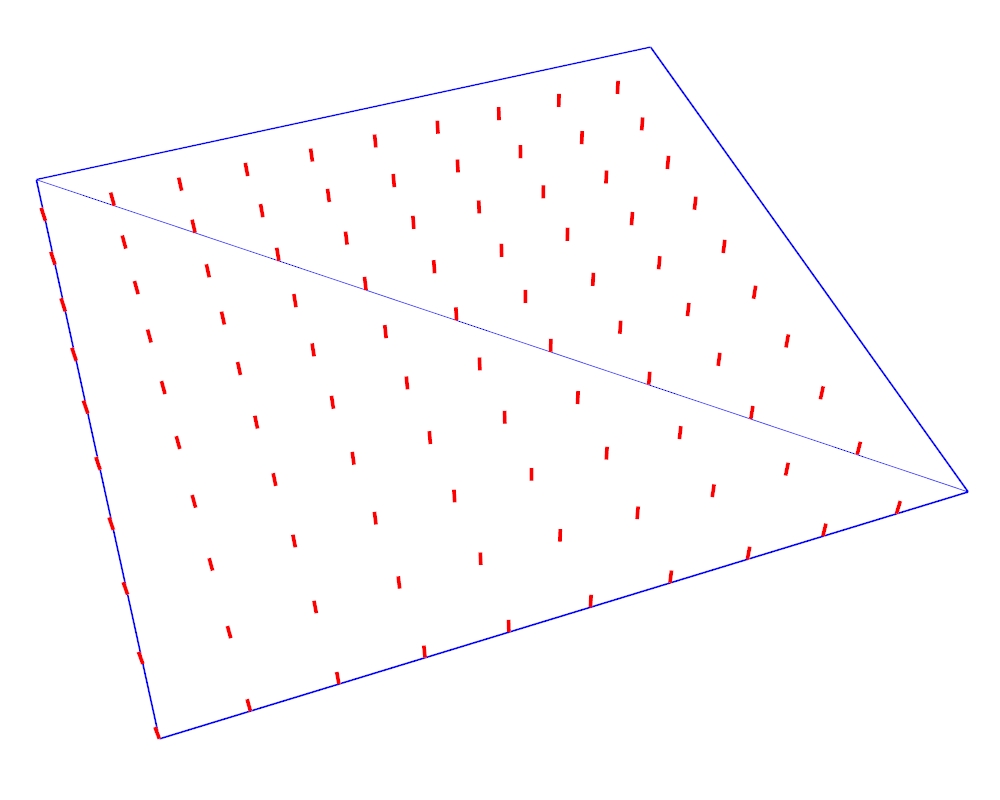
This is a simple grid distribution. The "Spacing X" and "Spacing Y" are the spacing between the scattered items respectively in the X and Y axes. The "Rotation" parameter lets you rotate the grid along the Z axis.
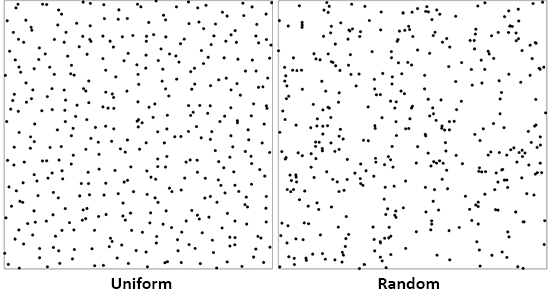
The Uniform type is similar to Grid but adds two "Jitter" parameters. The Jitter is a percentage of the spacing. The item will be inserted randomly within this distance.
Uniform is very useful for creating a random look while avoiding clusters and holes.
The image below shows the difference between Uniform and Random distributions.
The Random type is a true random distribution. Every item will be randomly scattered regardless of the others.
The only parameter is "Density". It defines the number of scattered items per length unit (in model unit). For instance, if you work in meters, and put 3 in "Density", on the surface there will be on average 9 items/m² (3x3=9).
In the Grid, Uniform and Random types, the default projection axis is the vertical (Z, blue) axis, projecting down. You can any other axis. This is very useful for green walls, for instance. In "Projection axis", choose "Custom", then click on "Pick axis". You can now pick the axis you want in the model.
The Vertices type inserts an item on every vertex found in the Surface/Curve. The selected objects will then get randomly distributed on those points.
The Faces centers type insert an item on the center of every face found in the Surface.
Beware of faces divided by hidden edges, you might get different results than what you expect.
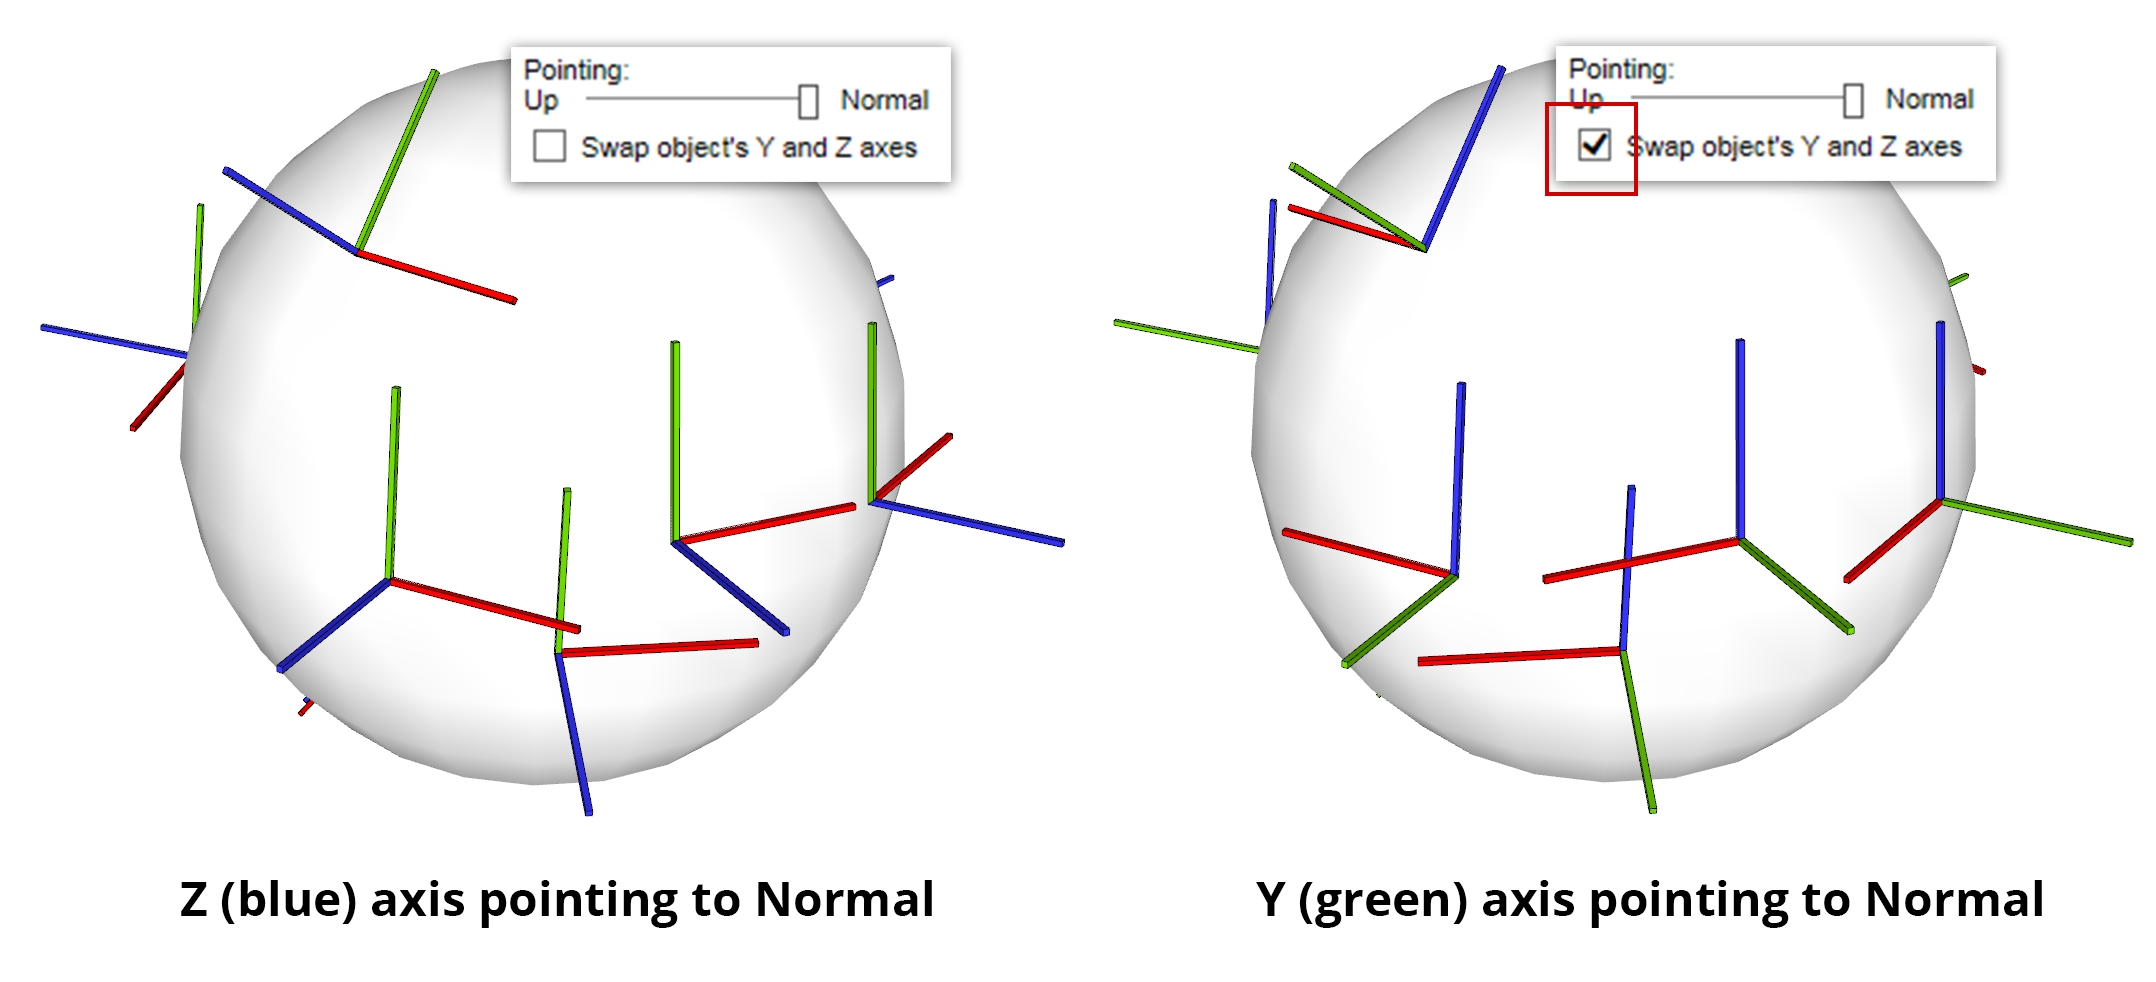
This slider defines in which direction the Z axis of the scattered item is pointing. You can set the slider anywhere you want between pointing up and pointing along the Normal.
This only works when scattering on Surfaces, as Curves and Points Sets don't have normals.
When the Pointing Direction is 100% to Normal, you get the option to swap the object's Y and Z axes. When you enable it, the local Y axis of the Scattered Objects point to the surface's normal, instead of the object's local Z axis. This is very useful when creating green walls for instance, when you want the plant leaves to lean toward the ground.
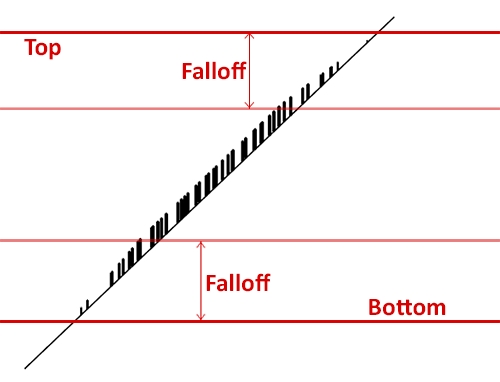
You can limit the distribution within a certain altitude range. "Top" defines the upper bound and "Bottom" the lower bound. The values are in model's unit. "Top" and "Bottom" are vertical distances from the model's origin.
The "Falloff" parameters lets you define distances which can alter density and scale (depending on what checkbox you tick) as we move closer to the range bounds.
Slope range is similar to Altitude range. You can limit the creation of items depending on the steepness of the surface. The parameters are in degrees. 90 is vertical and 0 is horizontal.
Collisions discards scattered items that are overlaping with others. The algorithm takes the longer size of the bounding box of the object and draws a circle around it. If circles are overlaping, items are discarded.
You can make the circles bigger or smaller using the "Size multiplier" parameter.
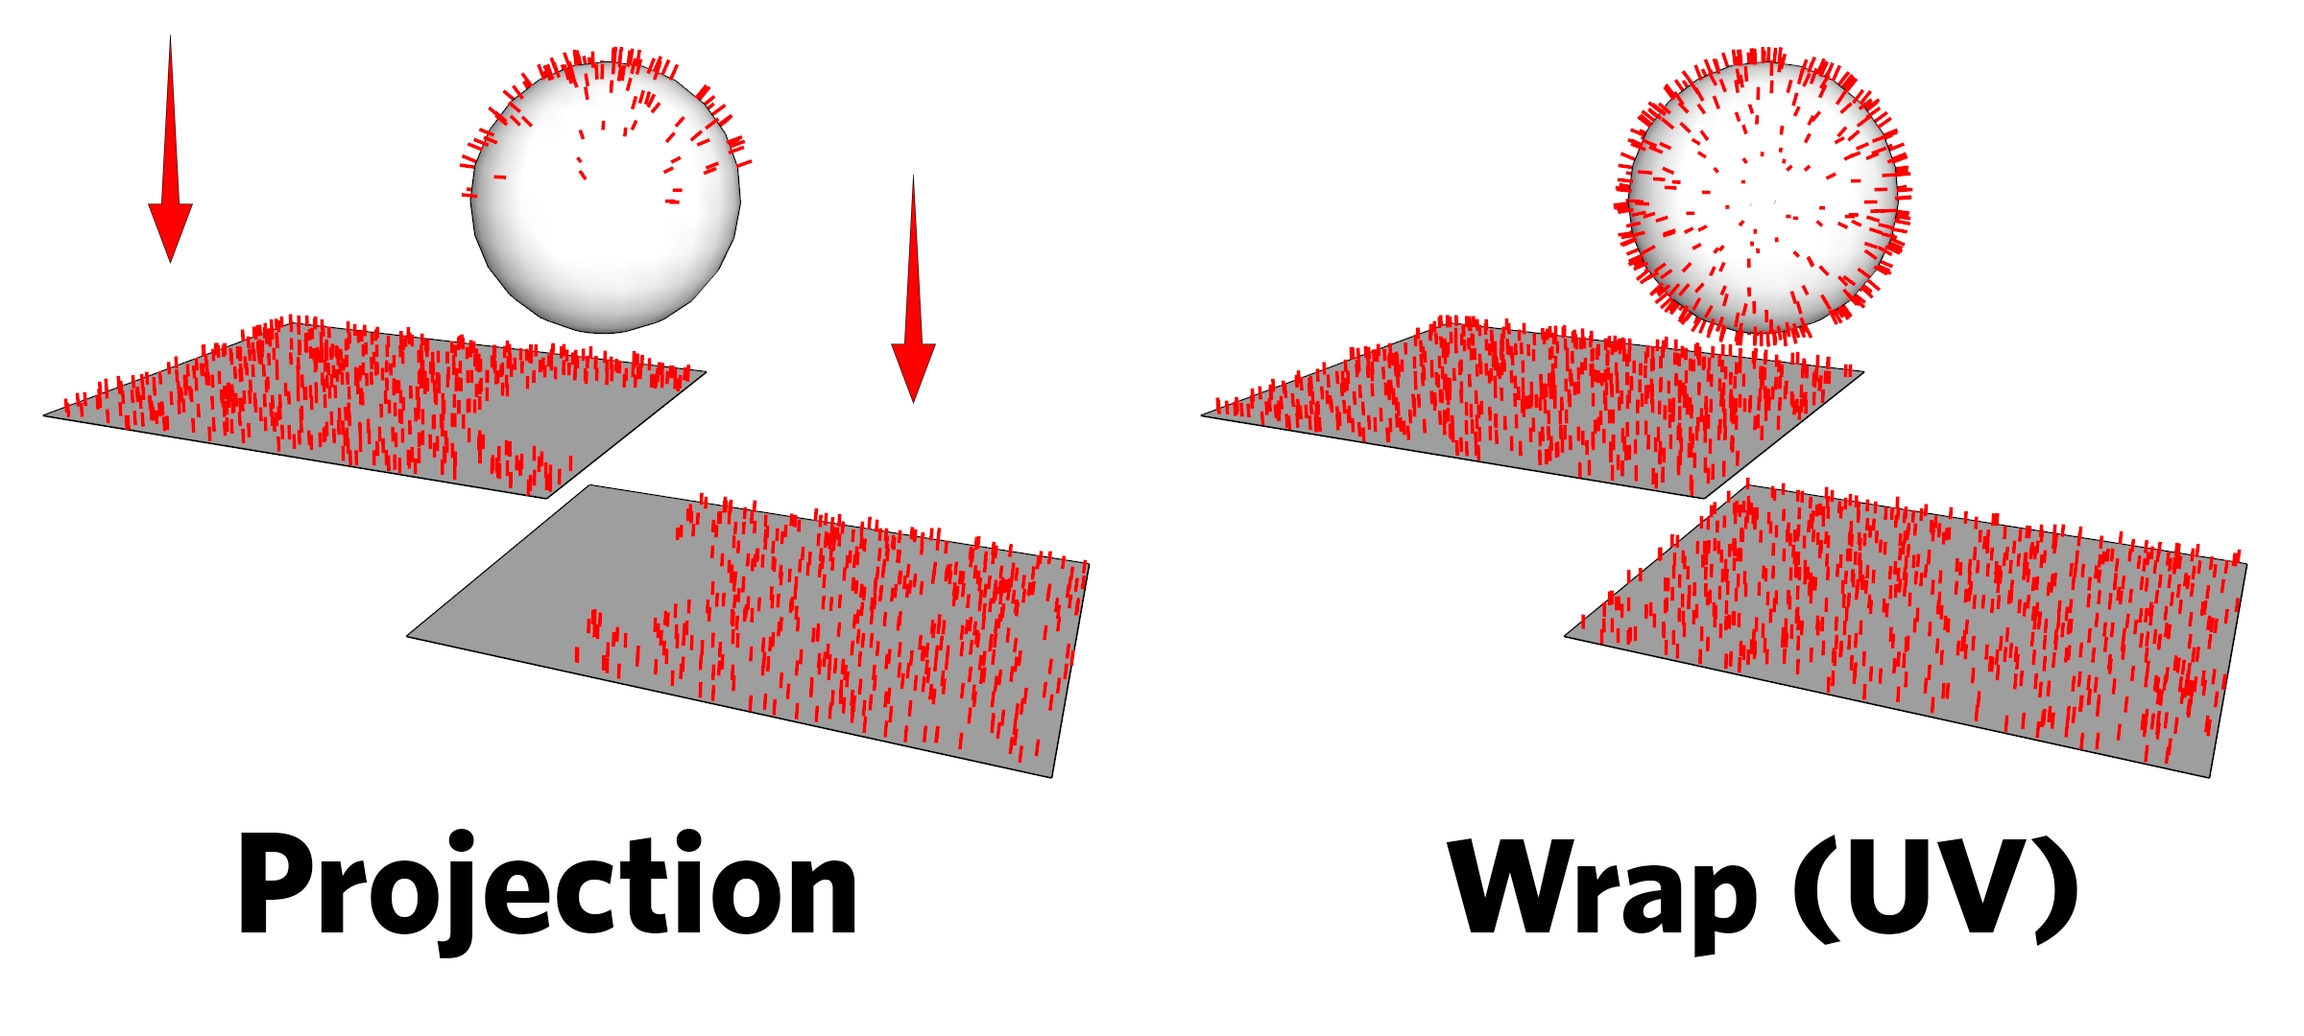
The Random type has two distribution modes : Projection and Wrap (UV) Projection will project the objects onto the surface along the Z axis. See Wrap (UV) will generate the object directly on the faces of the surface. See the image below. Make sure "Use surface boundaries as include area" checkbox is ticked for this to work.
