Creating a green wall
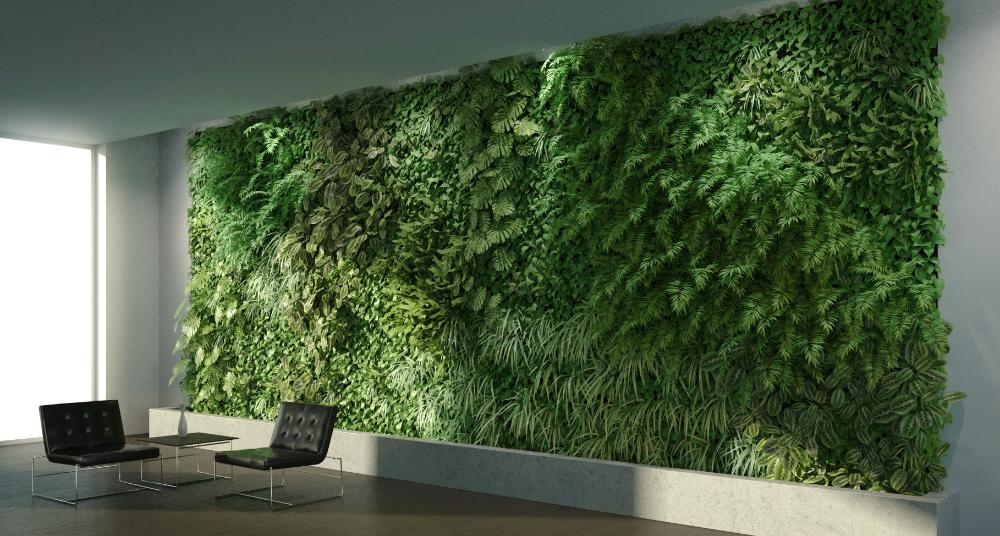
In this tutorial, we will learn how to create a green wall (also called vertical garden). The steps detailed here can obviously be applied to any kind of vertical surfaces, not just green walls.
The first thing to understand is the projection axis. As explained in the "Stuff to know" article, Skatter projects objects and area boundaries on surfaces along an axis. By default, it uses the vertical (Z, blue) axis.
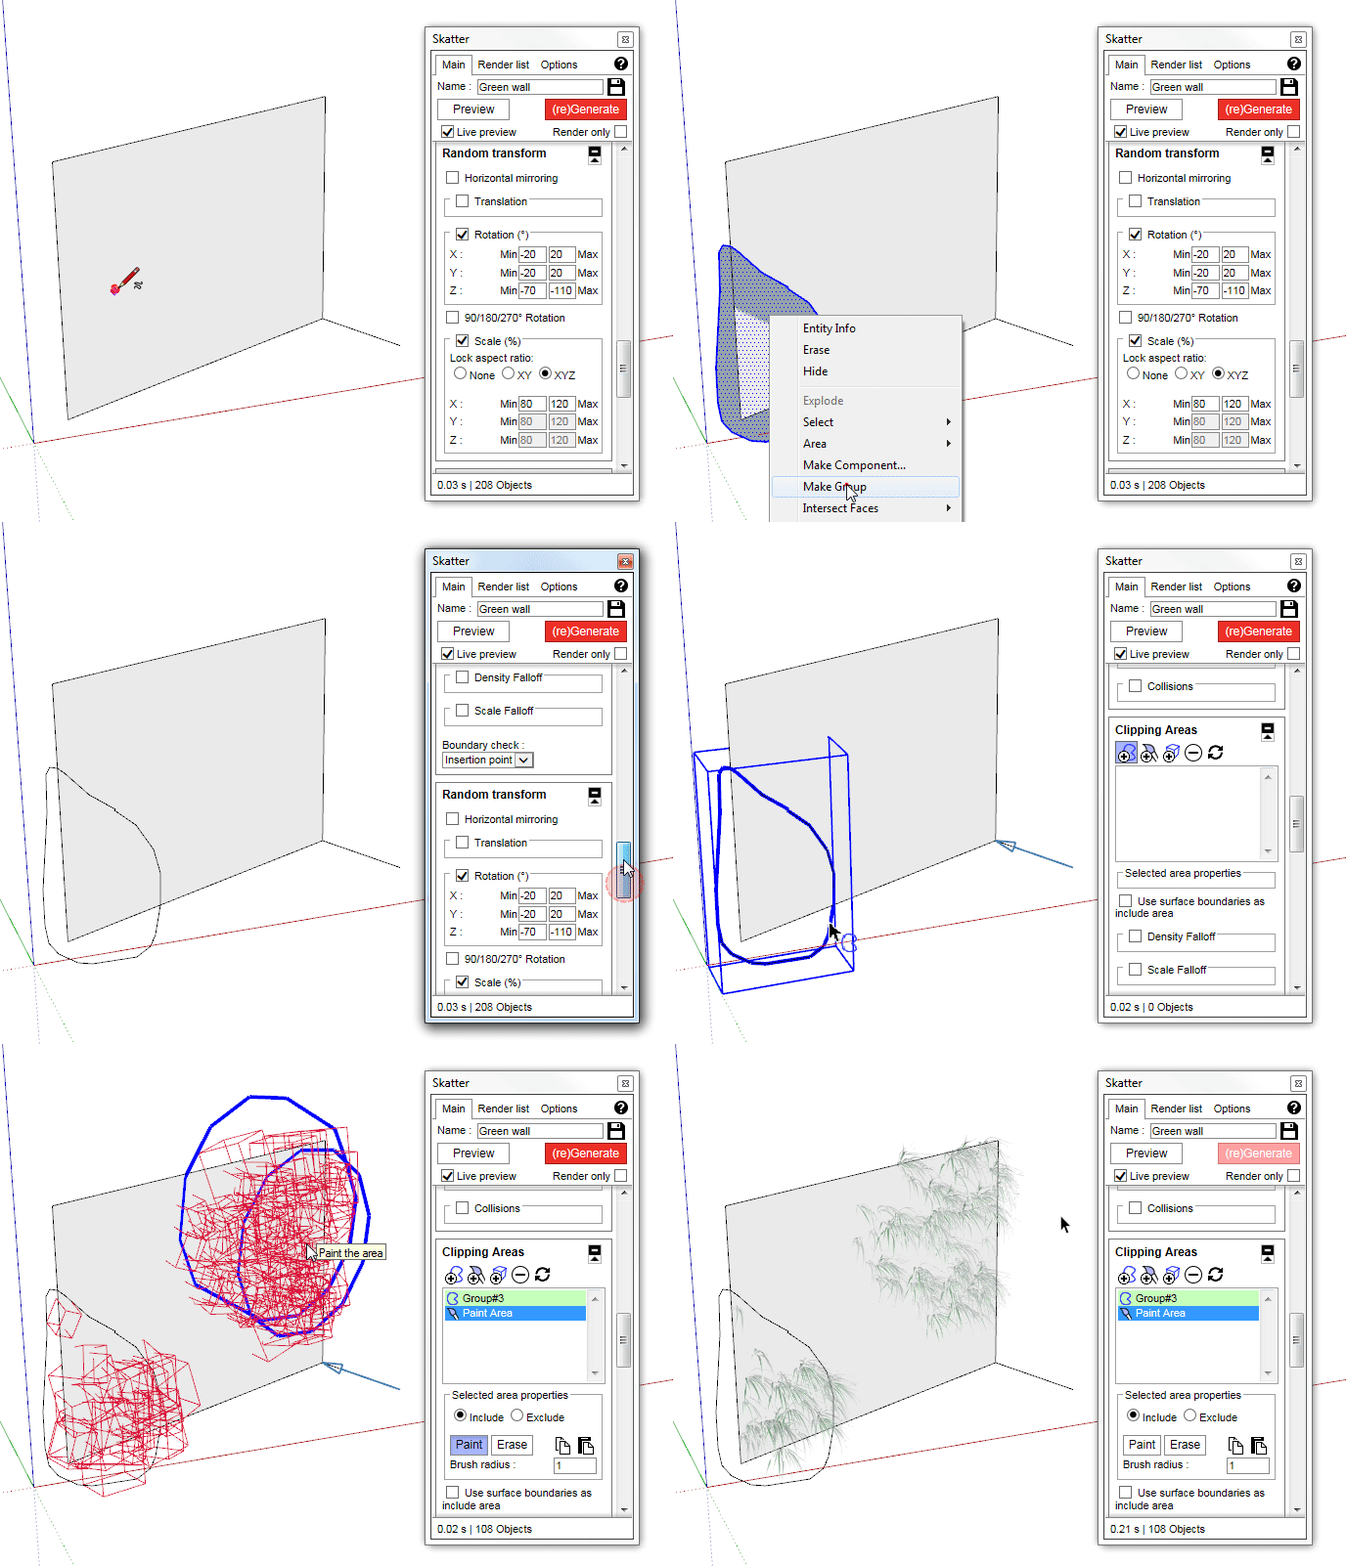
To create a green wall however, we want Skatter to project along a custom axis, facing toward the surface. In the Distribution rollout, in Projection Axis, select "Custom". Then click on Pick axis and select the axis you want. In the example below, I first drew a line perpendicular to the surface, that I used as a guide to pick the axis.
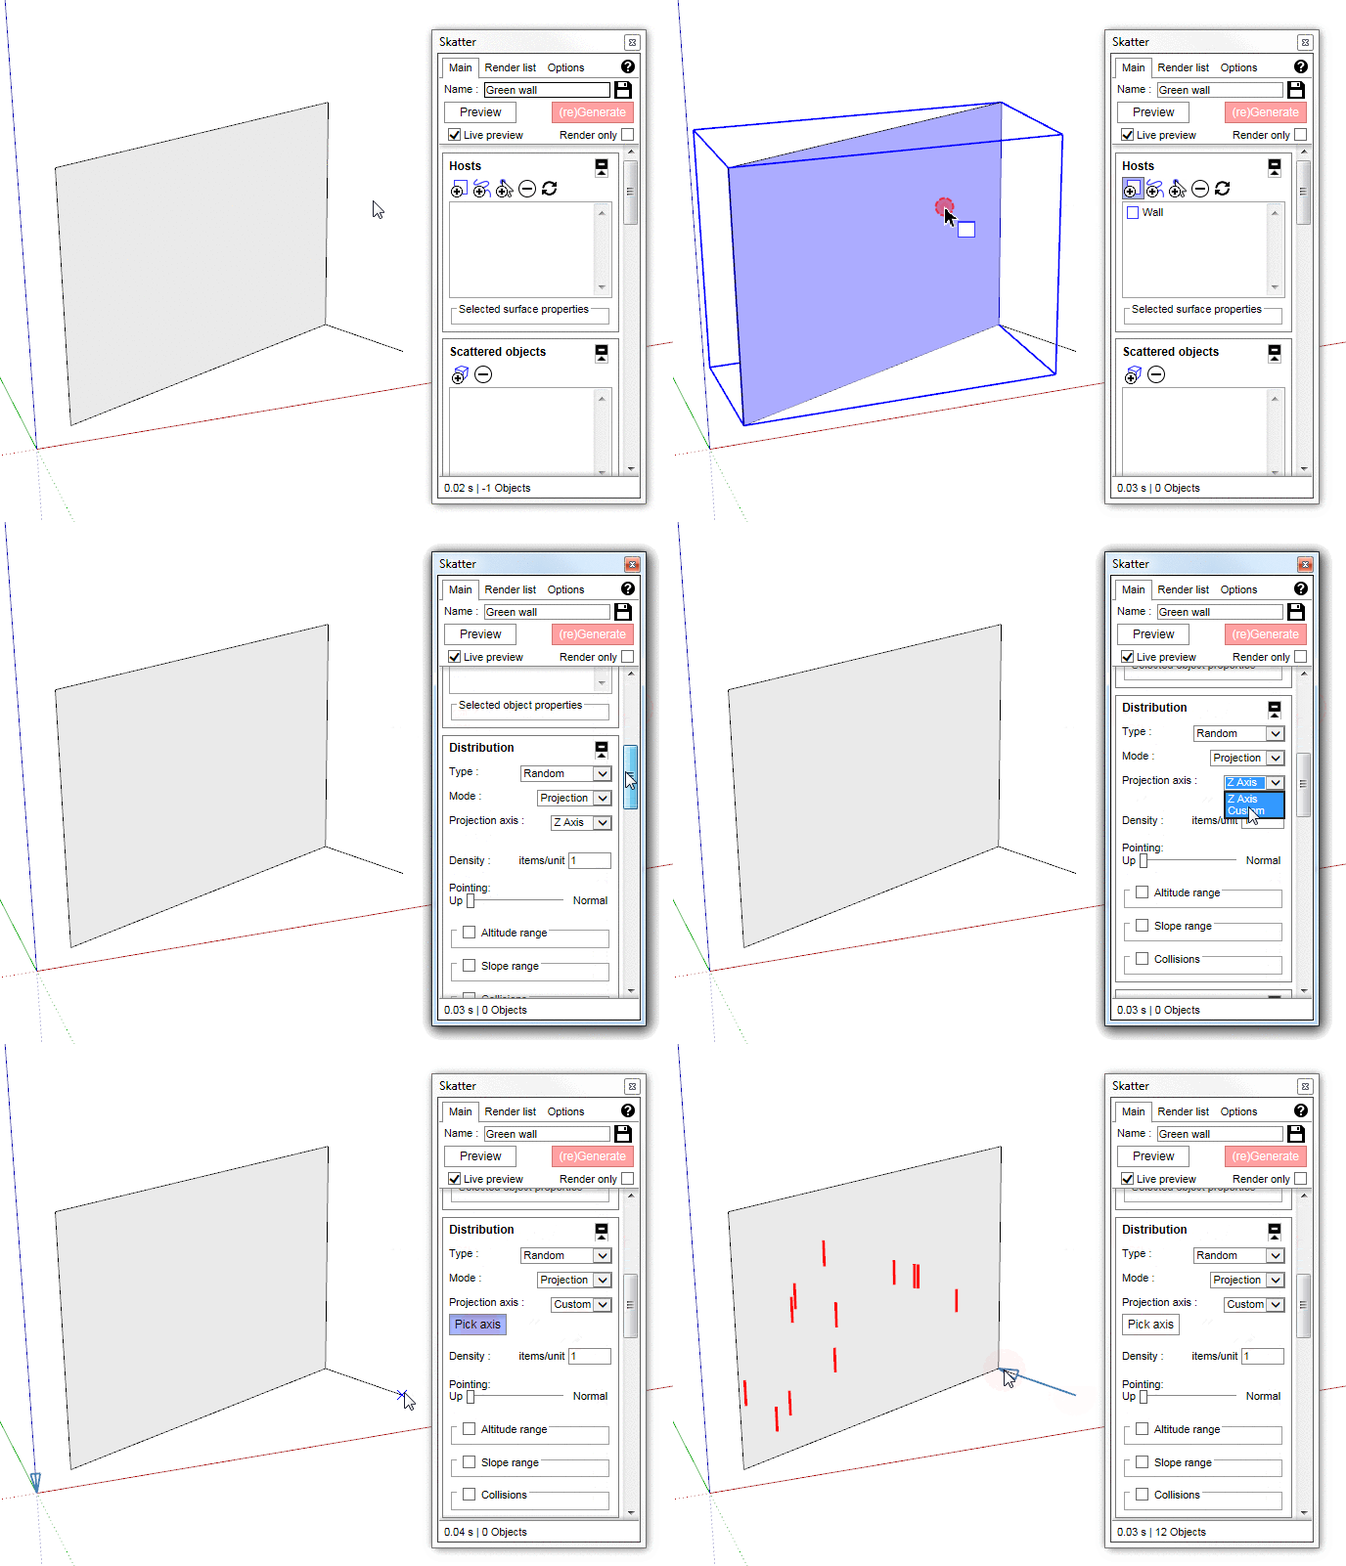
Now let's pick the plants I want to scatter on the wall.
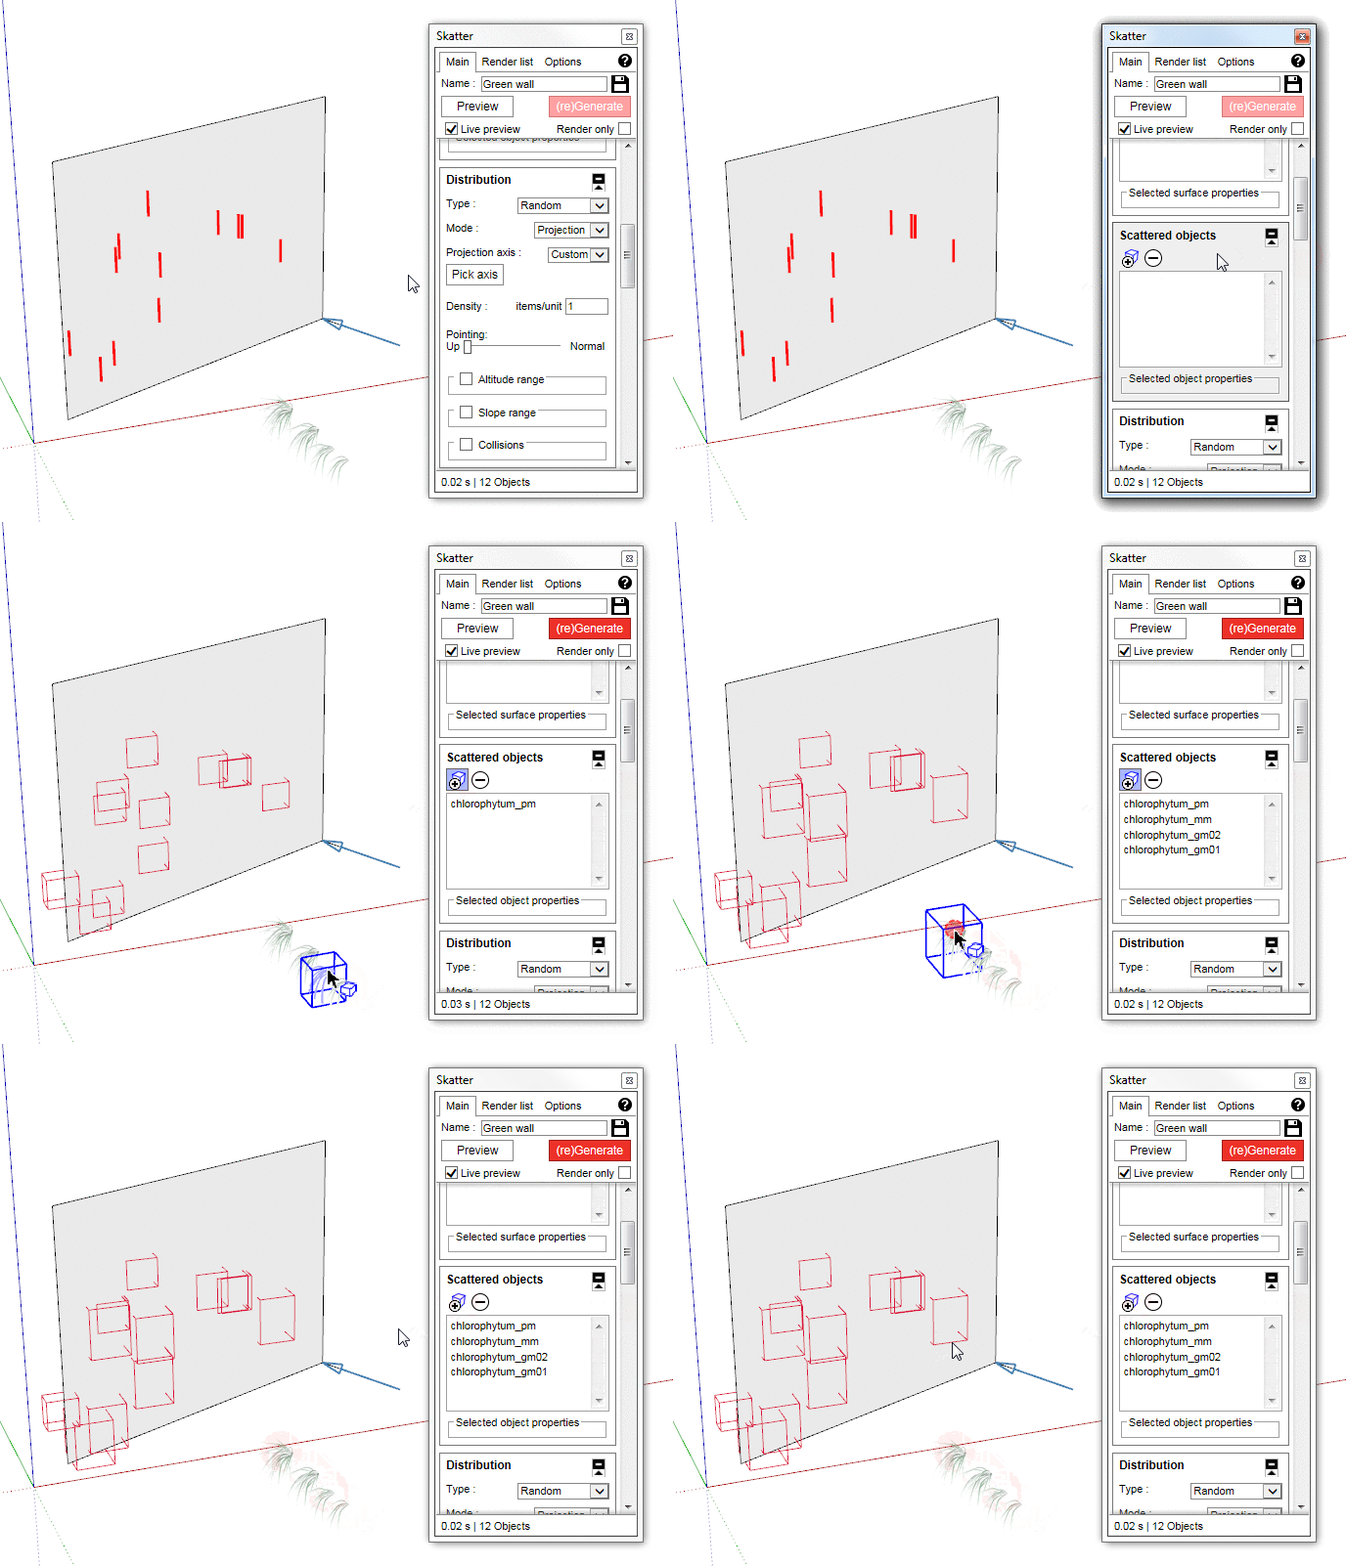
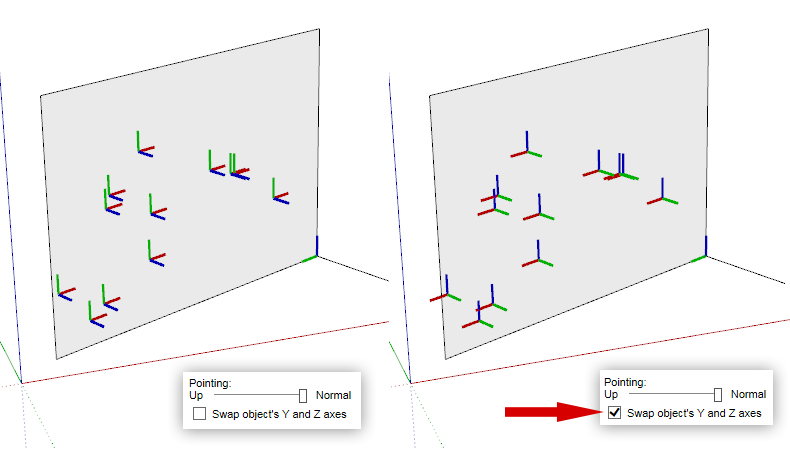
As you can see, by default the objects are aligned with the model axis, not with the surface. We will use the Pointing Direction feature to align the objects with the surface's normal.

The objects are now aligned with the surface's normal, but they are not correctly oriented. In this case we want the leaves to lean to the ground. This is because of the way the original objects were created. These have the Z (blue) axis pointing up, and the leaves are pointing away from the X (red) axis.
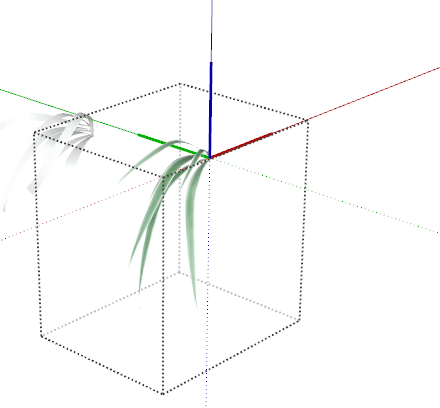
When we set the Pointing Direction to Normal, Skatter aligns the object's Z axis with the surface's normal. But here we actually want the object's Z axis to point up while having the object still aligned with the surface's normal. To do that, we need to check "Swap object's Y and Z axes" (this options is only accessible when the Pointing Direction is 100% to Normal) Click here for more info
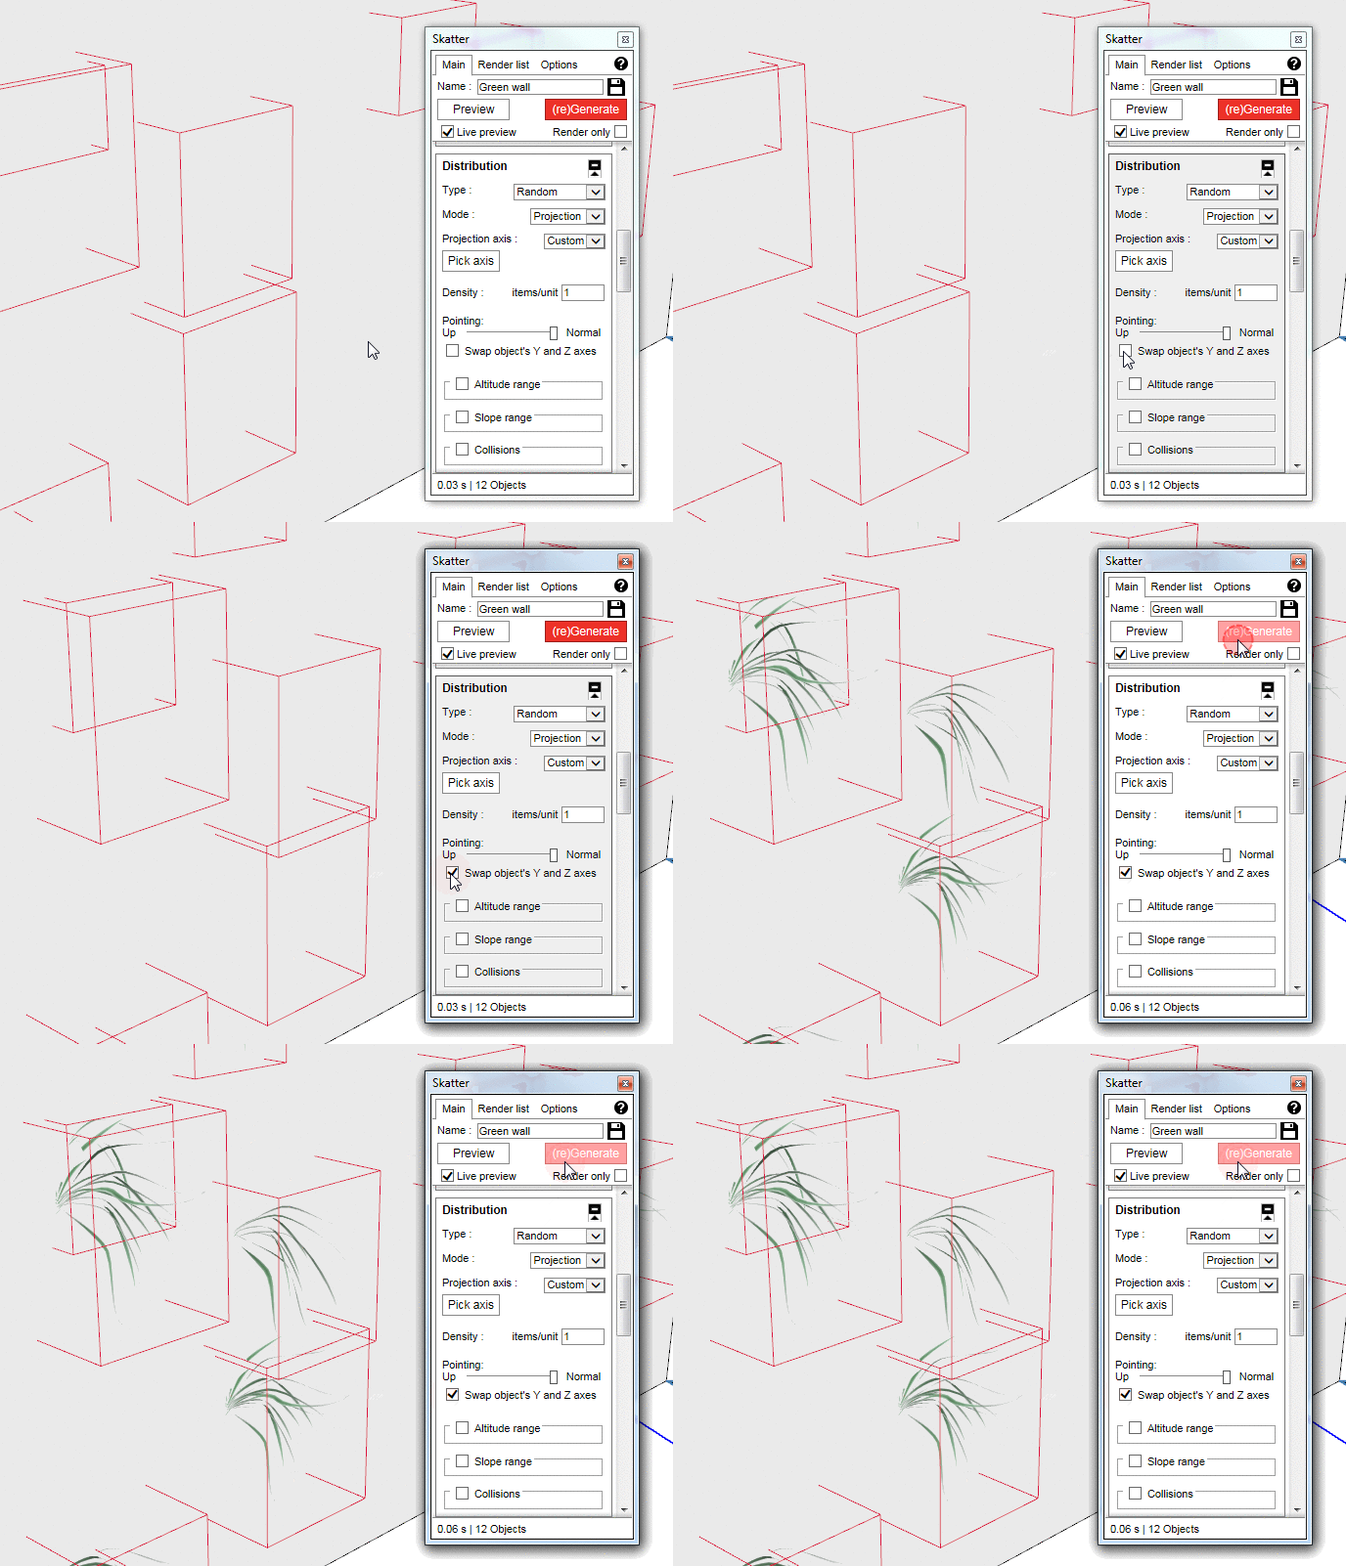
It's now better, the leaves are leaning toward the ground. But the orientation is not quite right, we need to rotate the plants -90 degrees (this is true for this particular case, but it will depend on how the original objects axes are oriented compared to the geometry. Try different values to see which ones work out for you). To achieve that, we will use the Rotation in the Random Transform rollout.
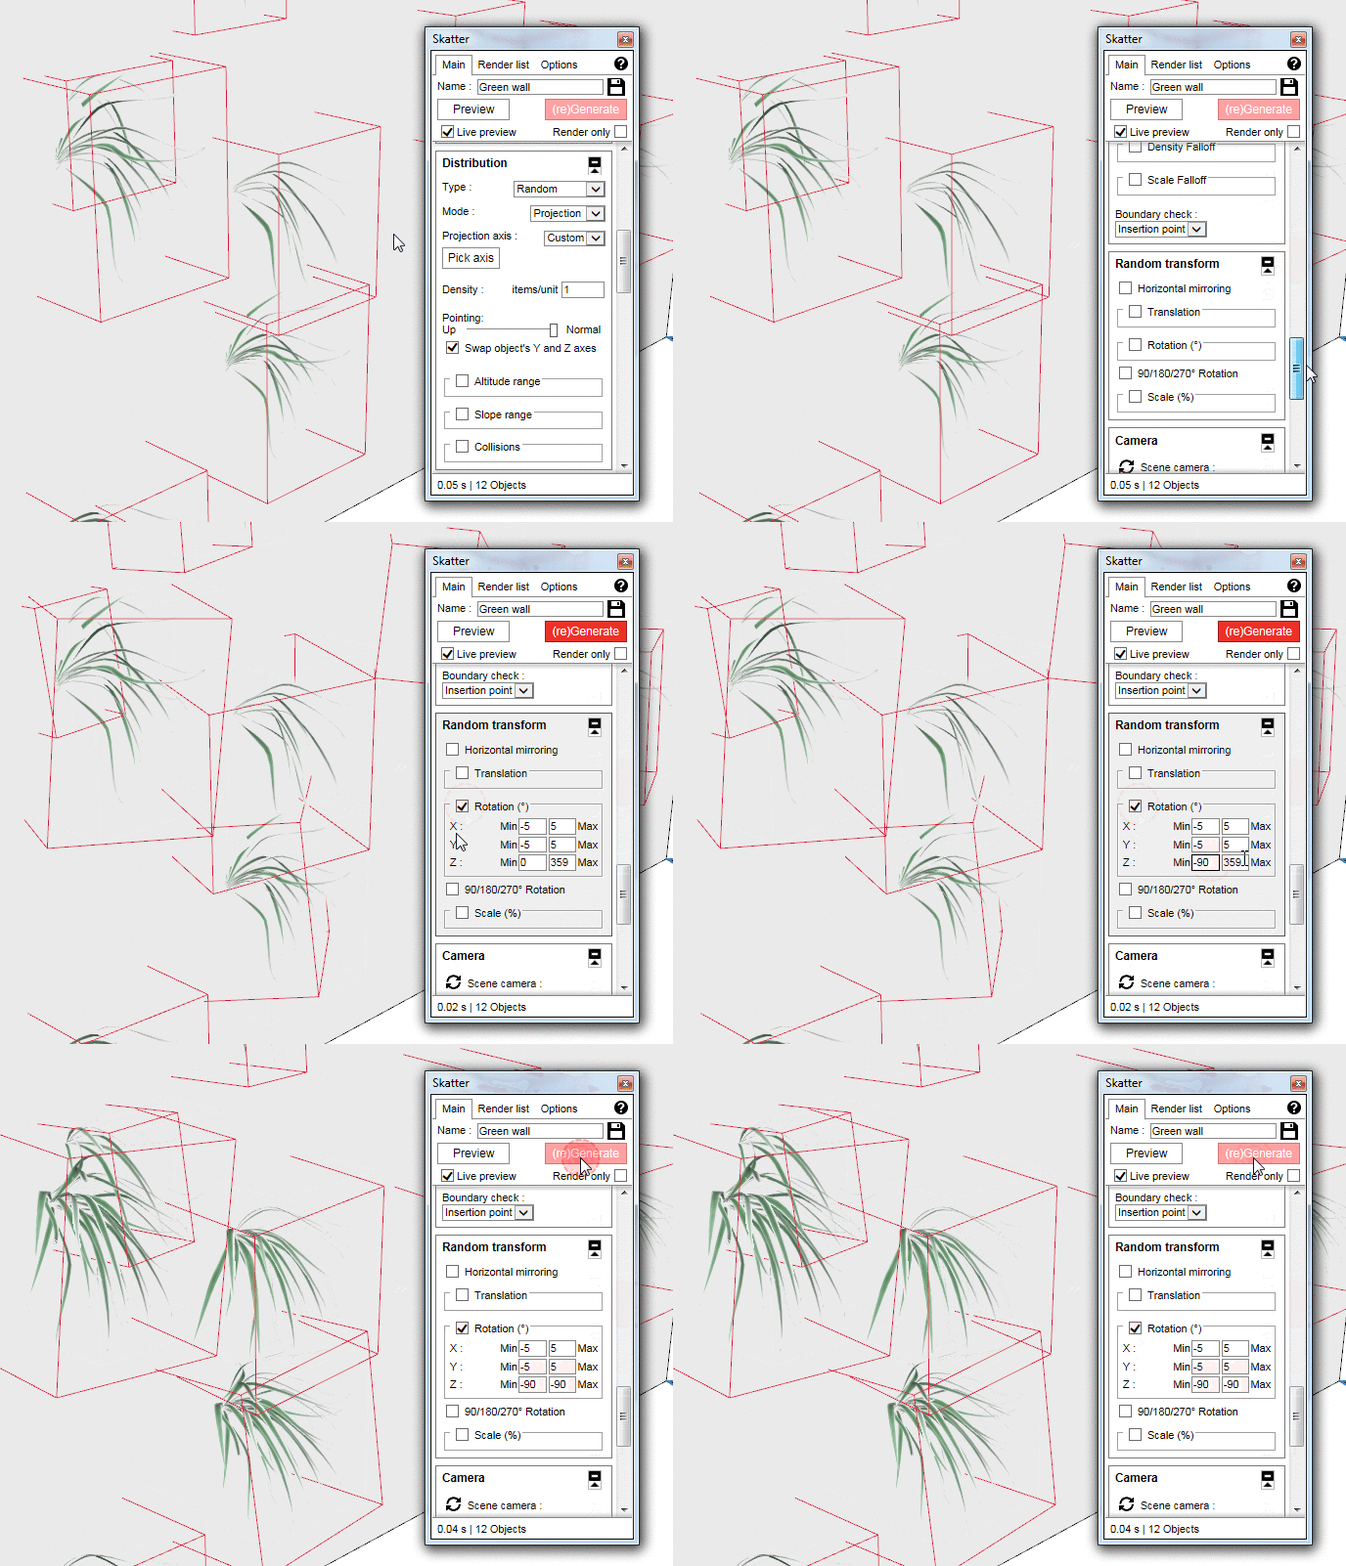
That's much better! Now, let's increase the density, add some Random Scale and tweak the Rotation values to get more randomness.
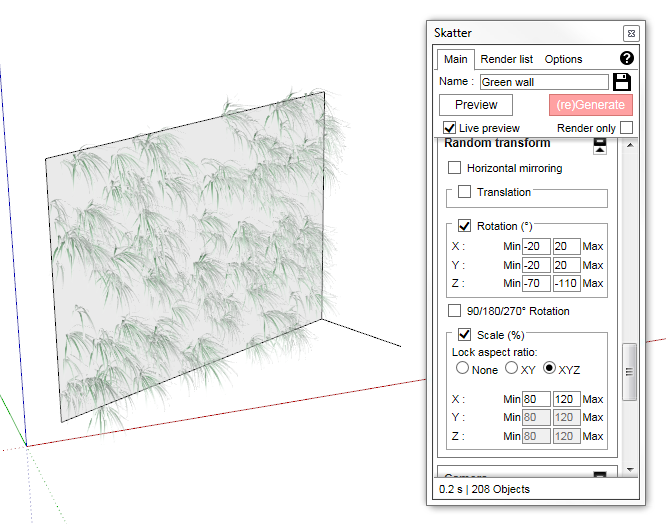
We could stop here, but I want to restrict the distribution of this particular plant to a specific area. It works on vertical surfaces just the same as on horizontal surfaces as usual. For more details, see the article about Clipping Areas
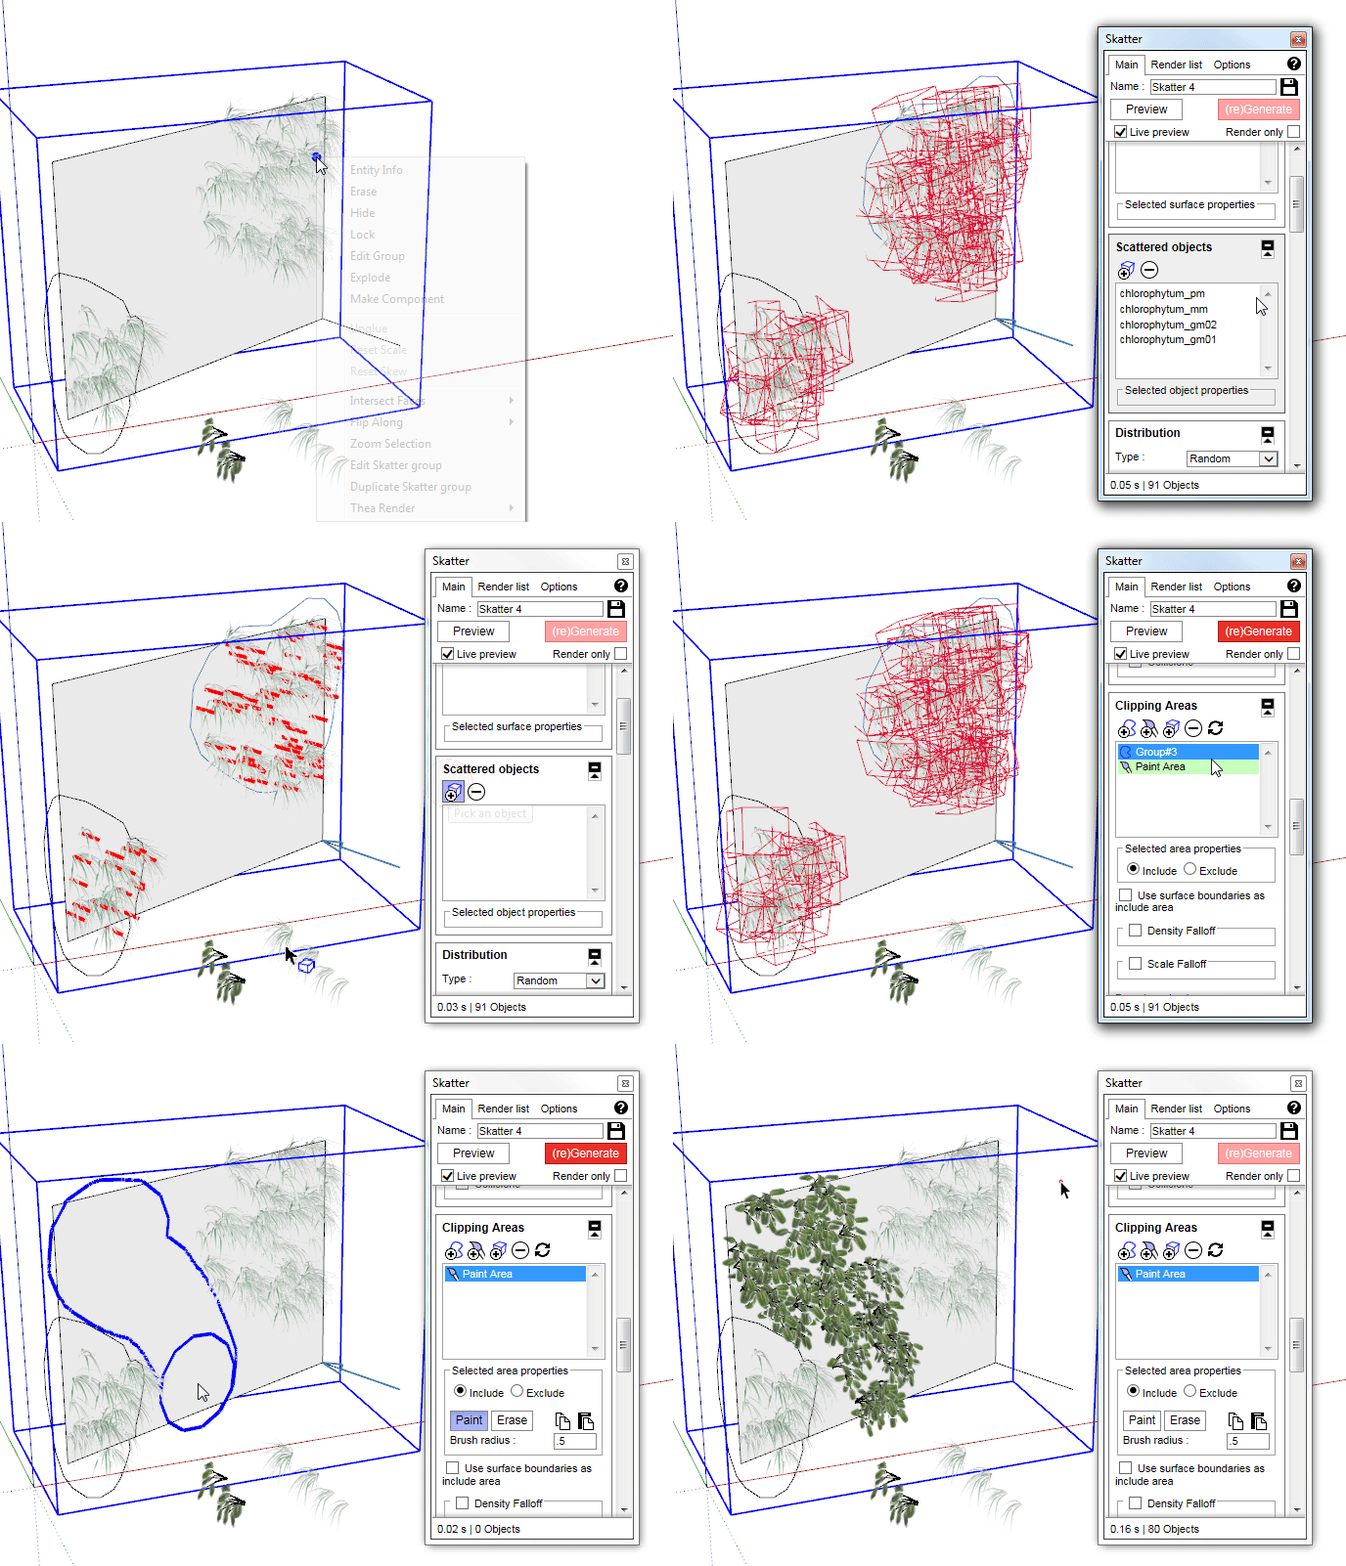
If we want to add other types of plants in different areas, but don't want to repeat the whole process from scratch, we can simply duplicate the setup we just created. There are two ways to do this:
- If it is a Render Only setup, go to the Render List, select the setup and click on the duplicate icon. ![]() - Otherwise, if it was generated in the model, right-click on the group and click "Duplicate Skatter Group"
- Otherwise, if it was generated in the model, right-click on the group and click "Duplicate Skatter Group"
Next, remove the old Scattered Objects from the list, and pick the new ones. Do the same with the Clipping Areas. You may also need to tweak the density, randomness, etc, depending on the new plant models.
With a little bit of work, you can quickly create a complex green wall like this:

Here is what the SketchUp viewport looks like:
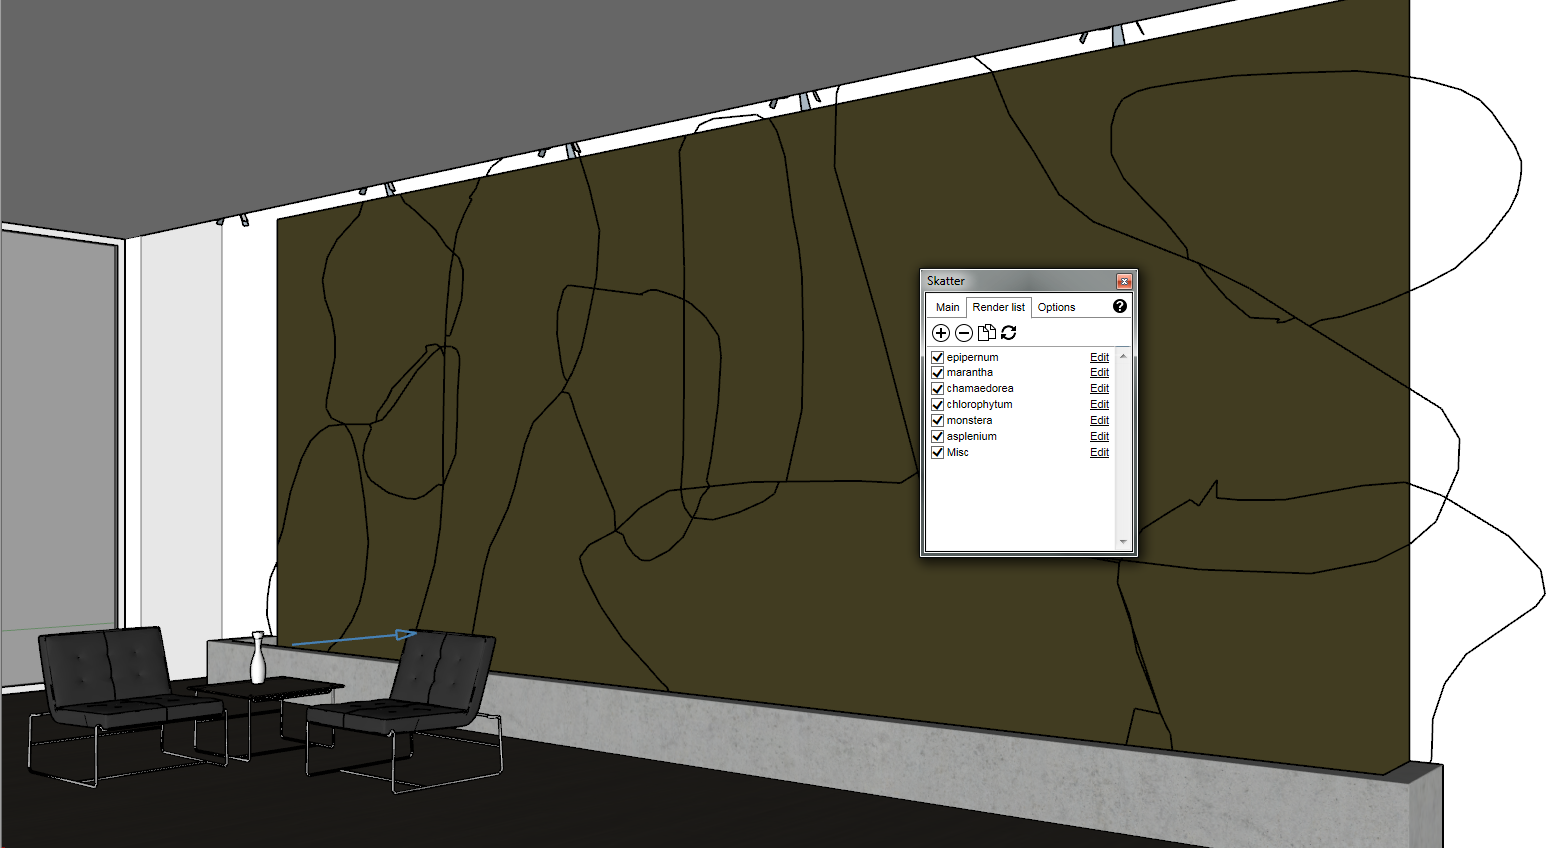
The high quality plant models used in this example are from Vimage Visualisation. You can download them here : https://gumroad.com/l/tOyB The collection also contains the above SketchUp scene ready to render in Thea with all the Skatter setups.
Last updated